User Tools
Sidebar
installation_guide:server_software_installation:manual_installation:creating_database:configuring_sqlserver_with_ad_authentication
Table of Contents
Configuring SQL Server with AD Authentication
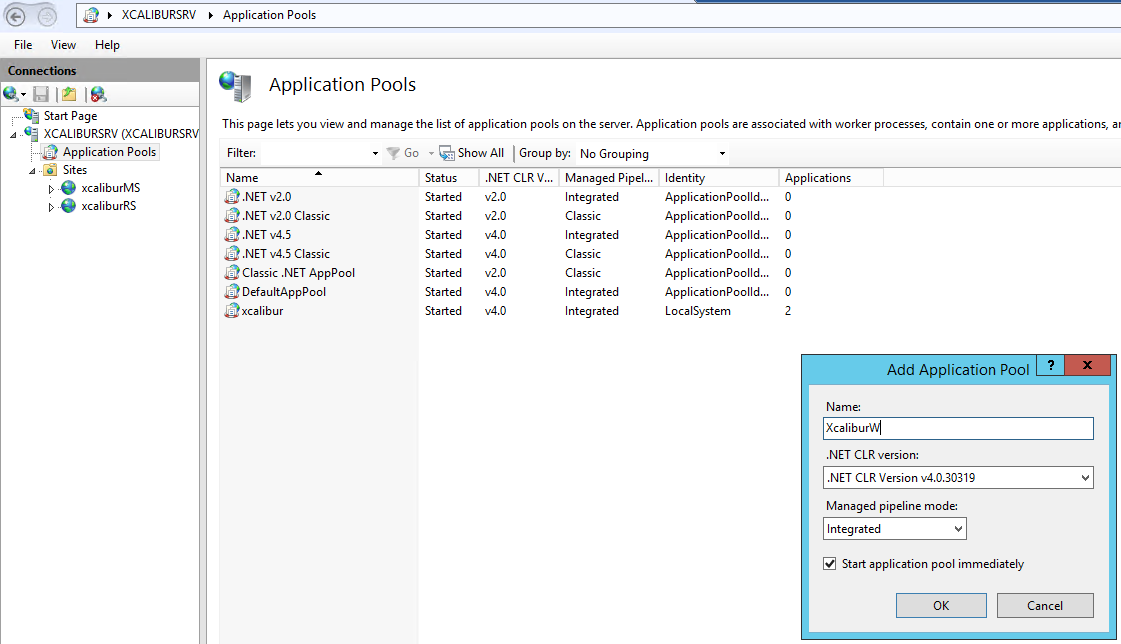
Add a Pool in IIS
In the Application Pools section, add the pool XcaliburW, framework 4.0, Mode “Integrated”, checkbox ticked.
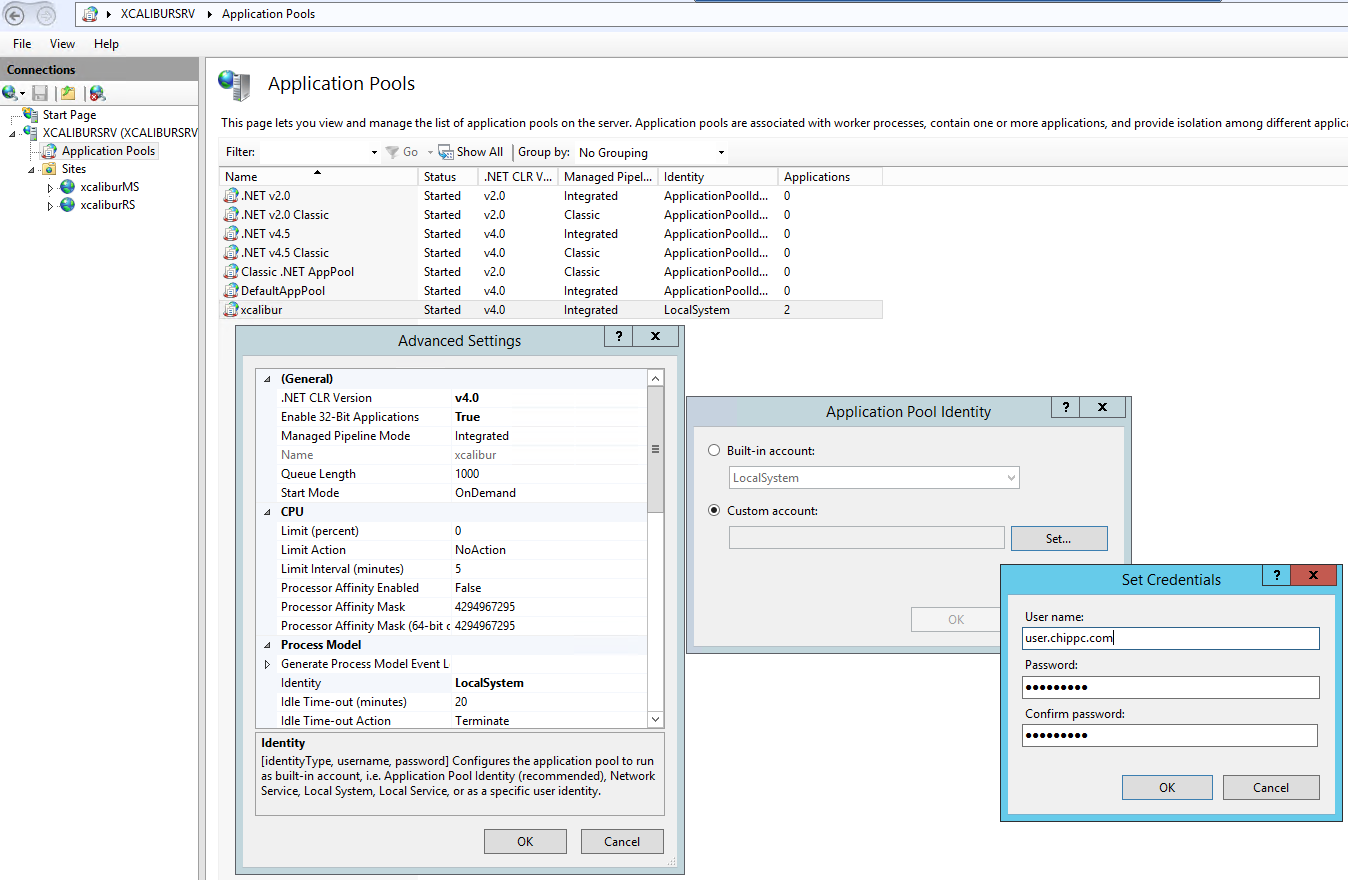
On the new XcaliburW pool, go to Advanced Settings and change the Identity value by adding the AD account.
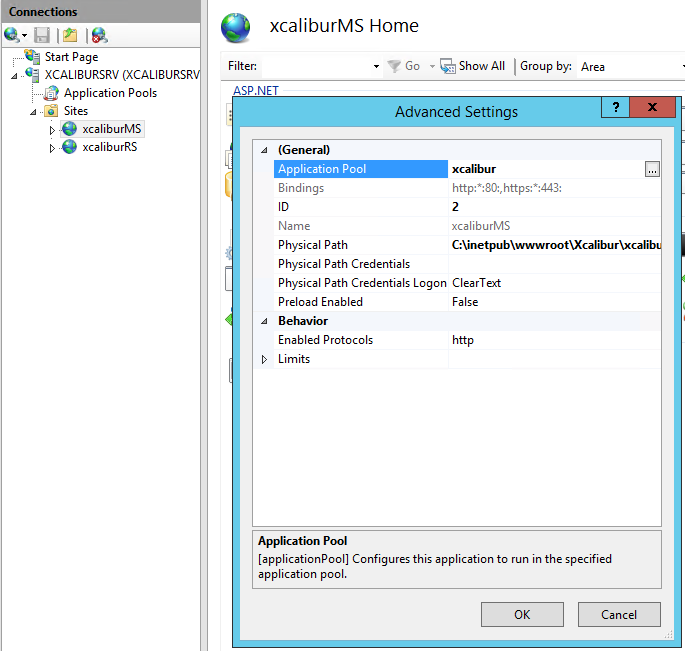
Select the Default Web Site from the tree on the left. Set the parameter Enable 32-Bit Applications to true and change the Application Pool to XcaliburW.
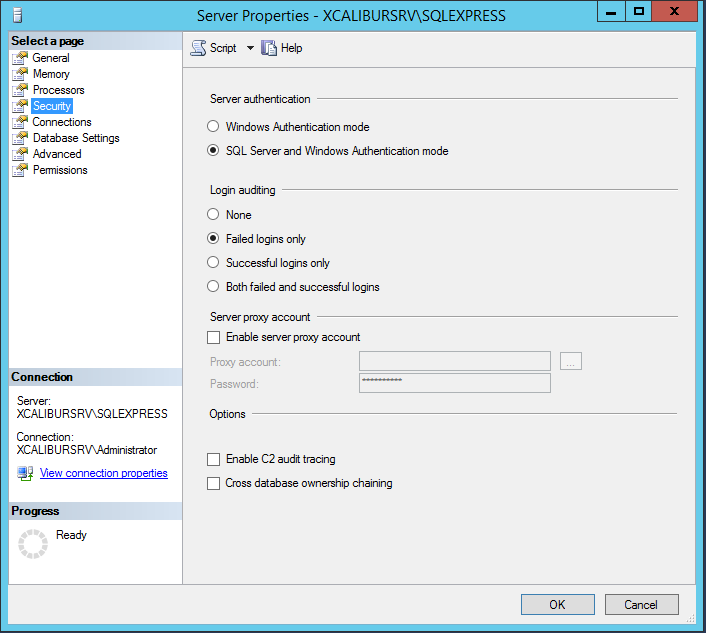
Ensure MS SQL Server allows connections with Windows Authentication!
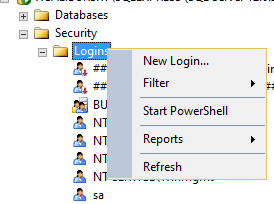
Add the user in the SQL Server
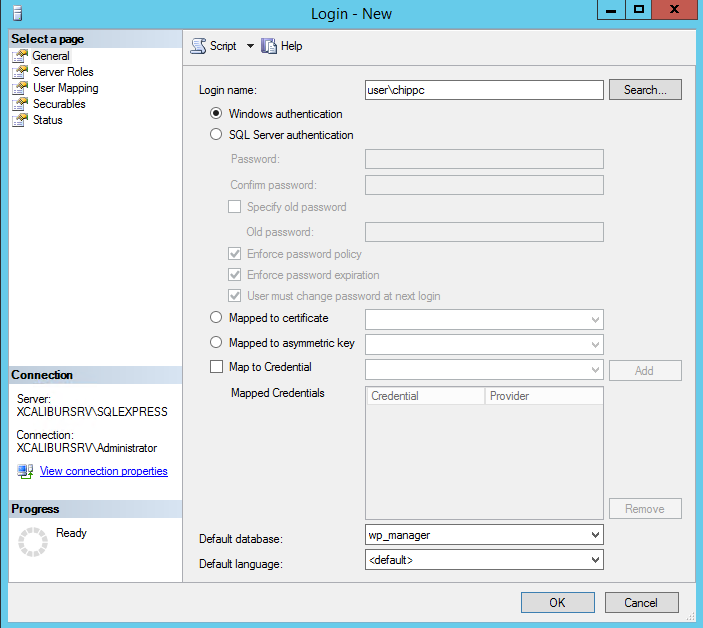
In the Login name field, add the AD account.
In the User Mapping tab, tick the “wp_manager” checkbox and add the “db_owner” rights.
Modifying the NHibernate Configuration File
Modify the “hibernate.cfg.xml” file as indicated below:
<!-- FOR SQLSERVER -->
    <property name="connection.driver_class">NHibernate.Driver.SqlClientDriver</property>
    <property name="connection.connection_string">Data Source=@SERVER;Initial Catalog=wp_manager;Integrated Security=SSPI;</property>
    <property name="dialect">NHibernate.Dialect.MsSql2008Dialect</property>
@SERVER = [@IP_address_or_host_name]\[SQL_connector_name] example : 192.168.2.79\SQLEXPRESS
Restart IIS
Restart IIS, and enjoy ![]()
installation_guide/server_software_installation/manual_installation/creating_database/configuring_sqlserver_with_ad_authentication.txt · Last modified: 2021/11/21 17:44 (external edit)

