User Tools
Sidebar
Table of Contents
Integration into IIS
General Remarks
Xcalibur W Server is accessed via a web interface hosted by Microsoft Internet Information Service (IIS). To install and run Xcalibur W, you will complete the entire configuration through the Windows MMC administration console.
Open the Windows MMC administration console by typing the following in the Start menu search box:
>mmc compmgmt.msc
The image below shows the administration console interface.
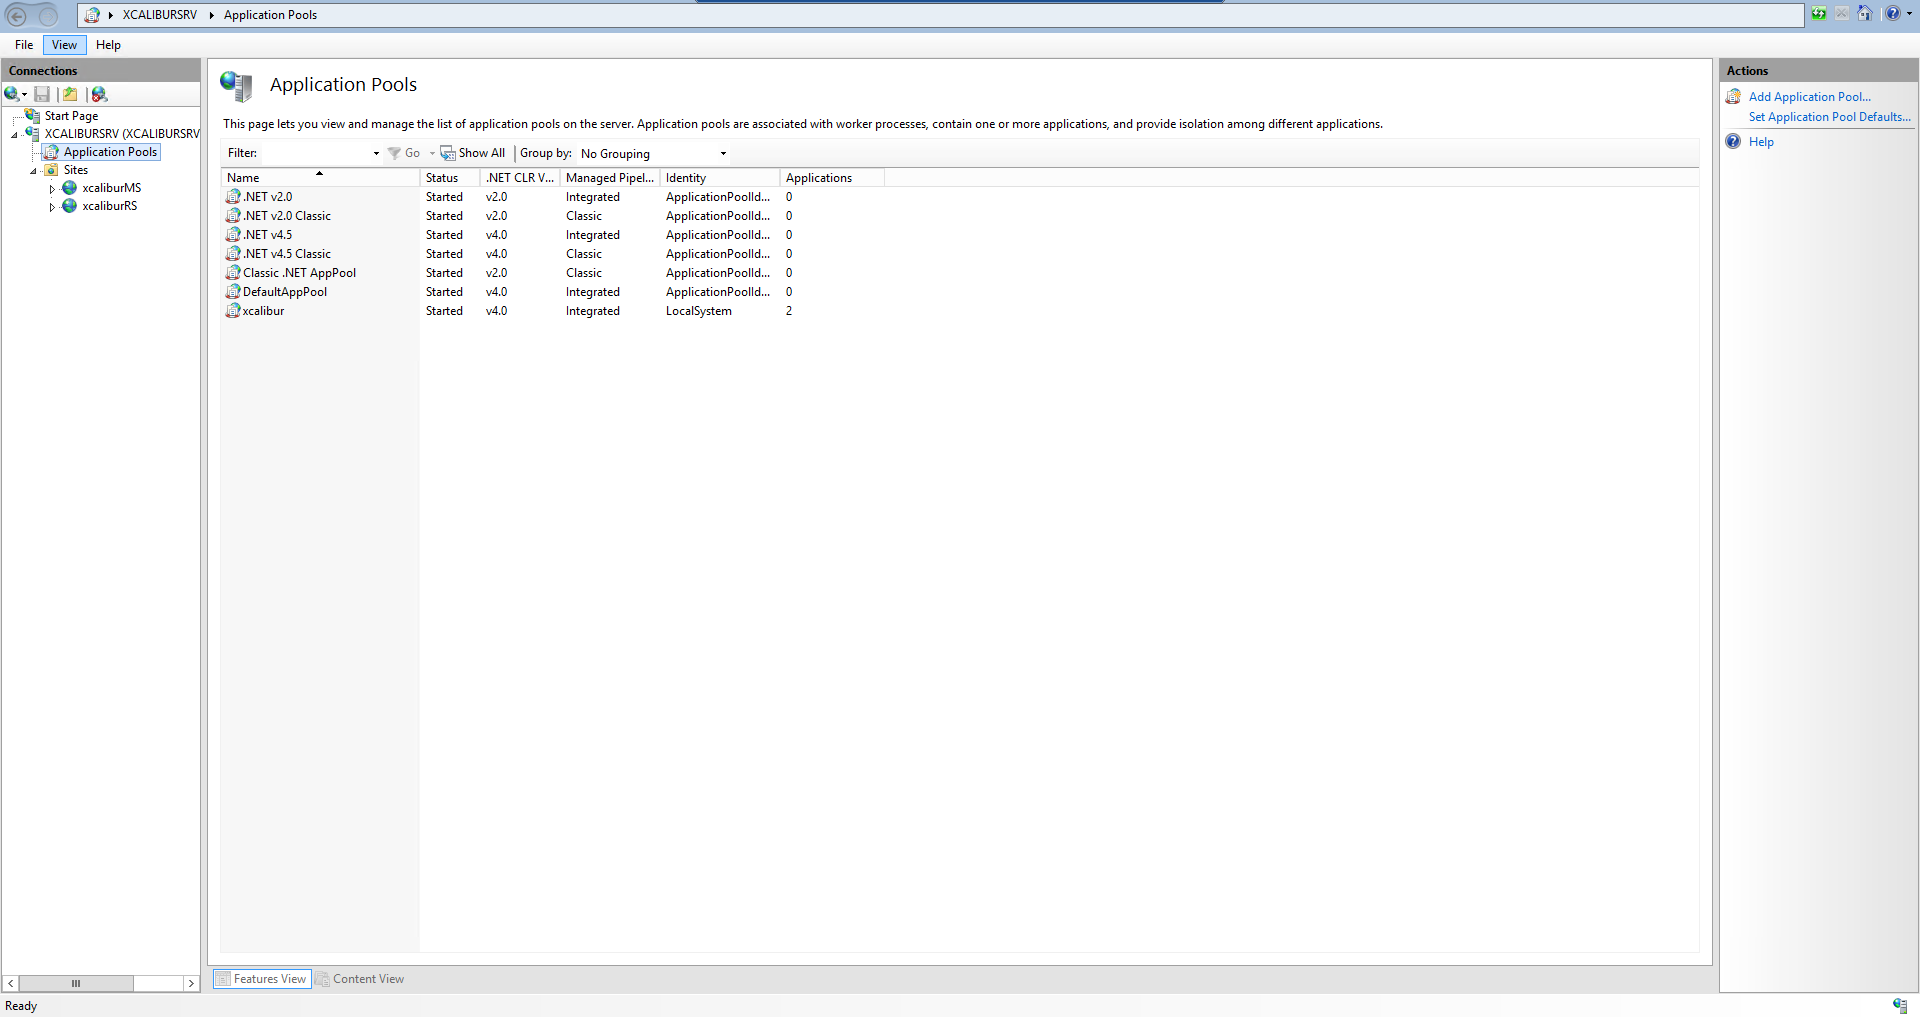
In the tree on the left, expand Services and Applications and select Internet Information Services (IIS) manager. When the IIS interface loads, you will see two sections in the window: The Pools and Sites tree on the left, and the management interface on the right. The management interface is specific to each site or pool selected in the tree.
Add the Xcalibur W MS Application Pool
Select Application Pools in the Pools and Sites tree. Then, in the Actions menu, select Add Application Pool.
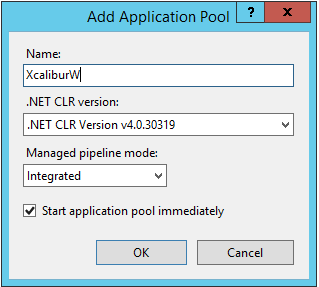
Configure the fields as shown below:
- Name : Xcalibur W MS
- Select .NET Framework version: with .NET Framework v4.0.30319
- Select Managed pipeline mode: with Integrated
- Tick Start application pool immediately
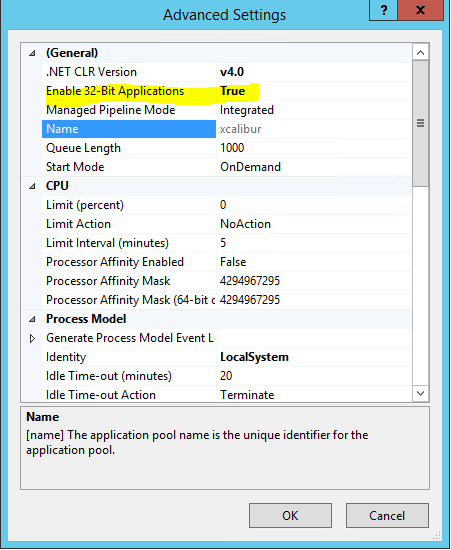
Right-click on the Xcalibur W MS application pool and then select Advanced settings…
- Set Enable 32-Bit Applications to True
Add the Xcalibur W Management Server Site
Caution : Deactivate any site that uses HTTP and/or port 80.
Select Site in the Pools and Sites tree, and then in Actions select Add a Web Site.
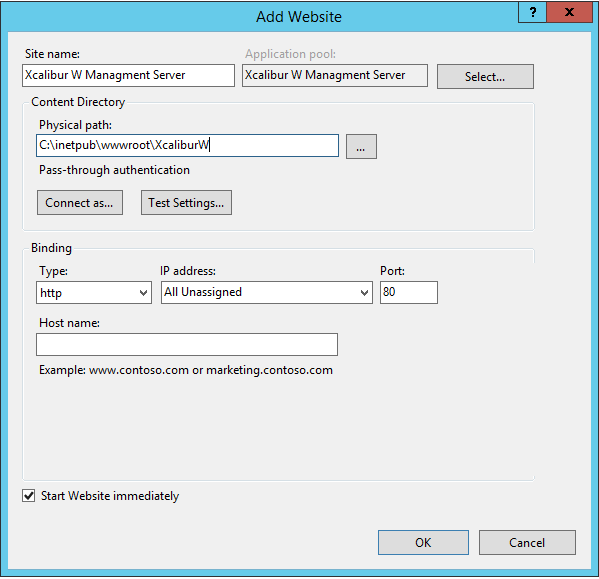
Configure the fields as shown below:
- Site Name : Xcalibur W Management Server
- Pool : Xcalibur W MS
- Physical path : C:\Program Files\XcaliburW\XcaliburMS
- Binding : https and port 80
Secure Mode
Xcalibur W must be accessible in secure mode for communication with agents, which means an SSL certificate must be installed. If you do not already have a certificate, you can generate one.
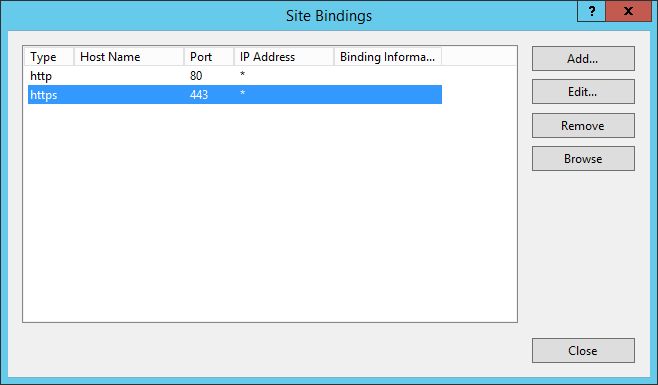
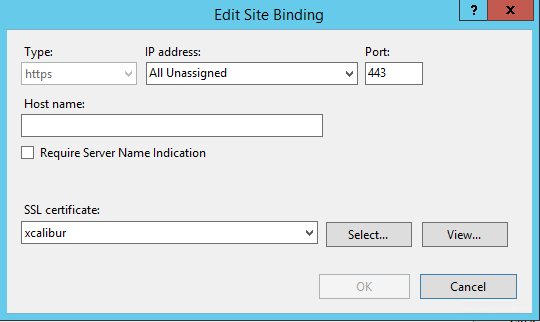
Select the Xcalibur W Management Server site in the Pools and Sites tree, and then, in the menu, select Edit Binding.
Click Add….
Select http in the Type drop-down, set the port to 443, and then select the SSL certificate you previously added.

